Wednesday, 23 May 2012
I originally started with using autonomous as the subject. Using people and to show that people are all different in their own ways. My photoshoot wasn't very successful, as the people I asked if I could photograph weren't that willing. So i struggled to use people within my photography. I then looked at my contact sheet of thirty six photographs and assessed the good and bad ones. I then decided I really quite liked a picture I had taken, were the photograph appeared layered. I then decided to use this picture and take it even further. I then took the idea of layering and drew my own picture of Kurt Cobain and then had another page were i wrote quotes from the artist, I then ripped round the first picture and stuck it onto the quotes, I scanned it into the computer and change the contrast and used some filters on it, I wanted to try out layering myself. I then took the image i really liked from my first photoshoot and turned it into a GIF. I went about this by, putting the image into photoshop and saving the picture separately in various different colours and then putting them all into GIF maker. I really liked this and the colours that were used in it, it really brought the picture to life and made it that little bit more interesting. Going back to layering I decided to research into some layering photography and there are examples of the pictures I liked the most on my blog. I like how the words layered the original image and how the words fitted with the picture. There are other pictures there too, which i really liked, especially the one were there is a burnt paper look onto of the picture. So i took both the burnt paper look and the writing layer into consideration and applied it to my chosen image. This was my base for the inspiration of my final images. I found a parchment on google and dragged this into google and put it over the original image this gave it a vintage effect, which i really liked. I took this even further by using the burn tool and burning the edges of the picture. I then wrote some words that i thought fitted well and blended them into the picture too. I thought of things to do with either Liverpool or England, like the Chinese train picture. I blended a Beatles into the sky of the picture, i thought this was very sutle but good, being such a famous picture, you don't even need the top half of it to recognise it. I then but the railway system on Liverpool into the pants of the picture aswell and a taxi and stop sign. I thought they all really worked well and i'm happy with the outcome of my final piece. I didn't even think i would end up with something like this, the example of trial and error has really worked for my benefit with the outcome i feel being really good.


I found a parchment on google and saved it and then opened it in photoshop. I dragged the image onto my original image and selected so the parchment image was behind the original one and used the multiply option. This gave it a vintage effect. I then burned the edges with the burn tool to take the vintage look even further. I then found some images on google that may represent Liverpool, like the railway network and the Beatles. I made some words for it myself too. I dragged all these images in one by one and moved them behind the original image and used the multiply option each time. Some images i had to go round with the rubber tool so they fitted in with the picture well. I still wanted the pathway to become clear, so that is why the images are round the sides and not in the middle, so your eye is drawn to the center. This has taken layering into consideration even more. I looked through several layered photography pictures and got alot of inspiration.
Wednesday, 16 May 2012


Wednesday, 9 May 2012
Contact Sheet


Wednesday, 21 March 2012
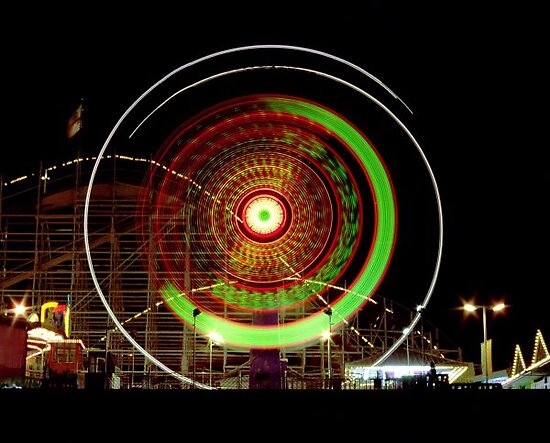
The rule of thirds is a "rule of thumb" or guideline
which applies to the process of composing visual images such
as paintings, photographs and designs The guideline proposes that an image
should be imagined as divided into nine equal parts by two equally-spaced
horizontal lines and two equally-spaced vertical lines, and that important compositional
elements should be placed along these lines or their intersections.Proponents
of the technique claim that aligning a subject with these points creates more
tension, energy and interest in the composition than simply centering the
subject would.
http://en.wikipedia.org/wiki/Rule_of_thirds

Wednesday, 14 March 2012


Wednesday, 7 March 2012
Board walk by Ian James

NCFE Photography
Tutor: Ashley Leach Media National Diploma Level 3 Year 1
To Do List UNIT 1 (DEVELOPING SKILLS)
Create1pagespreadon5ofthefollowingtopics. Thesemustincludea written description of the technique or method, 3 found photographic examples of the technique or method used, 2 - 3 of your own photographs exploring the technique or method used and a written evaluation of the positives and negatives to the technique or method.
Depth of Field
Rule of Thirds Alternative Compositions Light Trails Pin Hole Digital File Hacking Photogrammes Studio Lighting Dark room Processing Shutter Speed
The Brief UNIT 2
Explore one of the following concepts within your photography. Use a number of the photographic techniques and methods you have learnt withinthepastunittoprogressyourunderstandingoftheconcept. You need to explore visual representations of your thoughts and feelings by creating mind maps, mood boards and research into and around relevant artists. The three concepts are:
Concepts
Intrinsic Autonomous Redundant
Research UNIT 2 (DEVELOPING RESEARCH)
You need to produce the following within your sketchbook or portfolio:
• 1 in depth mind map on each of the 3 concepts. • 1 mood board on the selected concept. • A written description of your proposed outline for investigation
•Research into 3 relevant artists and/or contextual references that support and correlate your themes and ideas.
Idea Progression UNIT 3 (DEVELOPING IDEAS)
• A developmental and progressive photograph shoot of only 36 photographs that document your idea progression.
• Your 36 photographs need to be presented as a contact sheet with annotation on a selection of your strongest and weakest photographs.
• A written mid point evaluation outlining the process so far. This also need to highlight possible routes forward into your next and final photo shoot.
• A final refined photo shoot of 36 photographs with clear and defined intentions. This also need to be presented in a contact sheet with descriptive annotation on.
Final Selection UNIT 3 (FINAL PRESENTATION)
• A final selection of your image/s that explore comprehensively and explicitly your chosen concept.
• Thepresentationofworkisuptoyou. Exploredifferentmethodsand choose one that really highlights your photographic work and your skills.
Evaluation UNIT 3 (EVALUATION)
• Youneedtoproduceawrittenevaluationspanningfromthebeginning stages (methods and techniques) to the final presentation of your selectedphotographs. Consider;yourjourneythroughoutthisunit,the methods and techniques learnt, your idea progression, your final photo shootsandfinalselectionandpresentationofphotographywork. Also include, likes, dislikes, future practice and how this has fed back into your media course.
Subscribe to:
Comments (Atom)